Showing posts with label distressed. Show all posts

Sunday, 1 September 2013

Vintage Yellow Distressed Painted Bedside Tables

They're done, finally!

Yellow painted vintage bedside tables.
Sometimes a piece just seems to take a long time to complete. These are an example of that. I suppose because it's actually two pieces it just seems to take that much longer. To paint these gorgeous little tables I used a couple of coats of Zinnser Smart Primer followed by Taubmans Calabash which is somewhere between a bright and a pastel colour but not specifically in either of those categories! The colour has proven quite hard to photograph, however- you'll notice in some pictures it looks lighter and in some darker- it seems to change a little depending on the light.

I really felt as soon as I saw these that they would come up better in colour than they looked in their natural timber state or in white because they are a pretty bold piece of furniture on their own with a great shape and lots of natural personality!

Just so you can compare, here's a picture of them before...
The tables before- notice that our grass has been cut since?! Love freshly cut grass!

I kept the original hardware but painted the handles black which looks great against the yellow and complements the dark distressed wood exposed underneath. Here's what that looks like up close.
Detail of the vintage handles and distressed paintwork.
Finally, I don't often do this, but here is a 'blooper' pic- can you spot the fault?
whoops!

Yep, I took about 10 photos of the tables then noticed that one looked a bit funny- then realised I had put the handle on upside down!

What do you think? I would love your feedback- please leave a comment below. Want to buy them? Contact me via email or Facebook- you'll find me here! Don't forget to like my page and share this post!
Happy Painting!


Monday, 8 July 2013

Pale Blue and Whitewashed Distressed Coffee Table

My new coffee table. Love!!
I am beyond in love with my new coffee table. It's an old pine number that in its previous life was stained stained stained! I spent HOURS sanding out the thickest, deepest, darkest stain and as I did, this gorgeous timber grain appeared. Here is a (terrible) pic of the table before its makeover.


The coffee table before. I cannot describe how thick this stain was.

This piece of furniture is for our own home, which I love doing because I can paint with COLOUR! When I'm doing pieces for sale I try to be a little mindful of the fact that not everyone loves colour as much as I do, but I really think that once you've got some coloured pieces in your life you'll never want to go back again. Try it and see!
 

I had initially planned the pale blue legs with an oil top, similar to my shabby chic white hall table, but I was just loving the bare timber. Then my brother in law (BIL) mentioned that he had seen some cool white wash furniture whilst he was out and about (he's a very talented sparky) and the seed was planted. If you're following me on Pinterest you'll have noticed that I pinned quite a few white wash pieces on my Furniture Inspiration page. If you're not following me on Pinterest what a great opportunity to check out my boards, lol- search for Retro Vintage Love Furniture and you'll find me!

I painted the base in a pale blue / aqua of my own making and distressed them- I think the distressed look goes perfectly with the whitewash top, even though my husband just doesn't 'get' distressed. He thinks I've missed spots even though I actually spend quite a bit of time planning where I will distress and exactly how much to distress!

I loved trying out the whitewash technique. The effect is very subtle. I used about 1:4 paint to water ratio and was working quickly to brush on/rub off within about 30 seconds for each section. If you're new to painting this would be a great technique to try. I honestly don't think you could stuff it up, it's fast and fun. If you would like to give it a try and have any questions, please just email me or leave a comment! I finished my top with a spray of British Paints Poly top coat. I'm going to give it a week and see if I want to give it another coat too, depending on how much wear I use.


And finally, the finishing touch, I found the CUTEST little knob in a little shop near Eltham train station (this is also where I got the knobs for the little chest on my cover picture). How much do you love this stag?! If you haven't noticed, deer are the new birds. They are suddenly popping up in all the decorating magazines. As are cow skulls, which I am yet to be sold on. I love how the colours on this knob match perfectly with the top of the table.


What coloured furniture do you have (or want) in your home?

Til next time, happy painting!


Wednesday, 5 June 2013

Little Blue Shabby Lamp Table

My Shabby Chic table after some Retro Vintage Love!

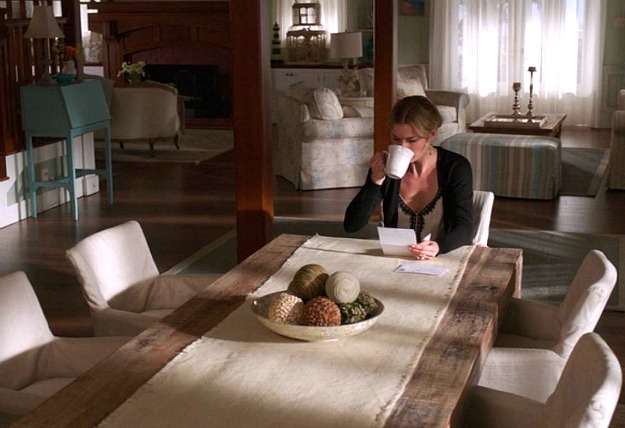
I cannot describe how much I love this little piece. I love the colour- I knew I wanted to do something blue after seeing some similar furniture in Revenge. See the gorgeous blue desk in the background?


Emily's Beach House in Revenge-dining table
Emily's furniture on Revenge. A shabby chic Hamptons dream!

Love it! I must admit, I am constantly distracted when I watch Revenge because I love both Emily and Victoria's furniture. And I'm not alone... read here for a whole Blog dedicated to Emily's house on Revenge. I have the same issue with A Place to Call Home. Gorgeous 1950s furniture everywhere.

Anyway, back to my latest piece. No long post about the process for painting this one as it was a very straight forward piece. The colour? I cheated! Remember my ombre chest of drawers? I had a heap of left over paint, in various shades of aqua which I mixed together to make this lighter colour.

I love this little hall table for it's natural distressed look. The original piece was a little worn down in parts, it had a few cracks and tiny holes which remained even when painted. All I had to do was distress it a little further after the paint had dried.

Love it too? Of course it's for sale! Check out my sales page for the link.
And just for those interested- the before and after shots.
Happy painting!